User login and consent flow
OAuth2 and OpenID Connect are powerful protocols for securing your applications and APIs. Ory OAuth2 & OpenID Connect is a highly flexible and customizable implementation of these protocols that allows you to easily bring your own user database, login UI, consent logic, and consent UI.
This guide will walk you through the process of customizing Ory OAuth2 & OpenID Connect to work with your user database, login UI, and consent logic and UI. We'll cover everything you need to know, including how to redirect users to your login endpoint, how to fetch and process login and consent requests, and how to use the SDK to accept or reject these requests.
Per default, Ory OAuth2 & OpenID Connect is integrated with Ory Identities and the Ory Account Experience. You only need to read this document if you want to customize the user backend, login ui, or consent logic and ui.
How Ory OAuth2 & OpenID Connect works
OAuth2 and OpenID Connect require an authenticated End-User session for all OAuth2 / OpenID Connect flows except the client_credentials flow which does not involve End-Users. Ory OAuth2 & OpenID Connect doesn't contain a database with End-Users but instead uses HTTP Redirection to "delegate" the login flow to another app - we call this the Ory OAuth 2.0 login & consent flow.
Example implementation
You can find an example Node.js implementation on Ory's GitHub for an app that implements both custom login and consent.
Login
The OAuth2 2.0 / OpenID Connect Flow is initiated by pointing the End-User's browser to the /oauth2/auth endpoint. Depending on
which flow ("Authorize Code Flow", "Implicit Flow", ...) you want to use, some of the query parameters (for example
/oauth2/auth?response_type=code, `/oauth2/auth?response_type=token, ...) might change but the overall initiation works always by
sending the browser to that URL.
The next task for Ory OAuth2 & OpenID Connect is to know the user of the request. To achieve that, Ory OAuth2 & OpenID Connect checks if a session cookie is set containing information about a previously successful login. Additionally, OpenID Connect parameters id_token_hint, prompt, and max_age are evaluated and processed. Depending on their values and the login state, the user might need to re-authenticate or the flow will fail.
To authenticate the user (this happens regardless of whether a session exists for the user or not), Ory OAuth2 & OpenID Connect redirects the browser to the "Login Endpoint" established in your config:
ory patch oauth2-config
  --replace "/urls/login=\"https://login.example.org/oauth2-login\""
Ory OAuth2 & OpenID Connect appends a login_challenge query parameter to the URL. The value is an ID which should later be used by the Login Endpoint to fetch important information about the request.
https://login.example.org/oauth2-login?login_challenge=7bb518c4
The way you authenticate the End-User is up to you. In most cases, you will show an HTML form similar to:
<form action="/login" method="post">
  <input type="hidden" name="csrf_token" value="...." />
  <!-- Use CSRF tokens in your HTML forms! -->
  <input type="email" name="login_email" placeholder="Please enter your email address to log in" />
  <input type="password" name="login_password" />
  <input type="checkbox" name="remember" value="Remember me on this device" />
  <input type="submit" value="Log in" />
</form>
Login endpoint code example
The Login Endpoint (set by configuration key /urls/login) is an application written by you. It uses the login_challenge value
in the URL to complete the login flow using the Ory SDK:
import { Configuration, OAuth2Api } from "@ory/client"
import { Request, Response } from "express"

const ory = new OAuth2Api(
  new Configuration({
    basePath: `https://${process.env.ORY_PROJECT_SLUG}.projects.oryapis.com`,
    accessToken: process.env.ORY_API_KEY,
  }),
)

function authenticateUserCredentials(email: string, password: string): any {
  // Example method to authenticate users and fetch them from the DB.
}

// Please note that this is an example implementation.
// In a production app, please add proper error handling.
export async function handleLogin(request: Request, response: Response) {
  const challenge = request.query.login_challenge.toString()
  const { data: loginRequest } = await ory.getOAuth2LoginRequest({
    loginChallenge: challenge.toString(),
  })

  if (loginRequest.skip) {
    // User is already authenticated, don't show the login form and simply accept the login request.
    await ory
      .acceptOAuth2LoginRequest({
        loginChallenge: challenge,
        acceptOAuth2LoginRequest: {
          subject: loginRequest.subject,
        },
      })
      .then(({ data }) => response.redirect(data.redirect_to))
    return
  }

  // Show the login form if the form was not submitted.
  if (request.method === "GET") {
    response.render("login", {
      loginRequest,
    })
    return
  }

  // The user did not want to sign in with the given app.
  if (request.body.submit === "Deny access") {
    await ory
      .rejectOAuth2LoginRequest({
        loginChallenge: challenge,
        rejectOAuth2Request: {
          error: "access_denied",
          error_description: "The resource owner denied the request",
        },
      })
      .then(({ data }) => response.redirect(data.redirect_to))
  }

  const user = authenticateUserCredentials(
    request.body.email,
    request.body.password,
  )

  // Check login credentials (e.g. email + password) in your user database.
  if (user!) {
    response.render("login", { error: "invalid credentials", loginRequest })
    return
  }

  // User was authenticated successfully,
  return await ory
    .acceptOAuth2LoginRequest({
      loginChallenge: challenge,
      acceptOAuth2LoginRequest: {
        subject: user.id,
        remember: Boolean(request.body.remember),
        remember_for: 3600,
        context: {
          // You can add any context that you want to be available to the consent endpoint.
        },
      },
    })
    .then(({ data }) => response.redirect(data.redirect_to))
}
The response contains information about the login request. The body contains a skip value. If the value is false, the user interface must be shown. If skip is true, you shouldn't show the user interface but instead just accept or reject the login request!
Once the End-User authenticated successfully, you either accept the login challenge, or you reject (for example the user isn't allowed to perform OAuth2 flows) the login challenge.
Consent
Once the login challenge is accepted, Ory OAuth2 & OpenID Connect will ask the user for consent:
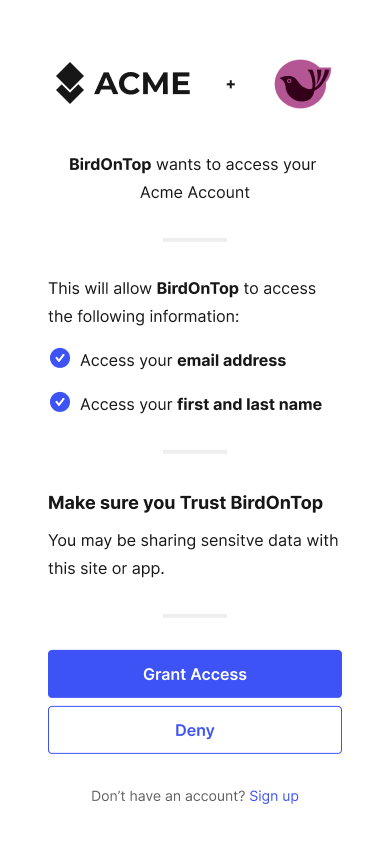
The logic and UI is fully under your control, because Ory OAuth2 & OpenID Connect redirects the End-User's browser to the "Consent Endpoint" established in your config:
ory patch oauth2-config
  --replace "/urls/consent=\"https://consent.example.org/oauth2-consent\""
Ory OAuth2 & OpenID Connect appends a consent_challenge query parameter to the URL. The value is an ID which should later be used by the Consent Endpoint to fetch important information about the request.
https://consent.example.org/oauth2-consent?consent_challenge=7bb518c4eec2454dbb289f5fdb4c0ee2
The way you collect the consent information from the End-User is up to you. In most cases, you will show an HTML form similar to:
<form action="/consent" method="post">
  <input type="hidden" name="csrf_token" value="...." />
  <!-- Use CSRF tokens in your HTML forms! -->
  <input type="checkbox" name="scope" value="email" />
  <input type="checkbox" name="scope" value="profile" />
  <input type="submit" name="submit" value="accept" />
  <input type="submit" name="submit" value="reject" />
</form>
Previous consent
A consent has four distinctive attributes:
- The requested scope (
scope=email+profile+offline_access); - The OAuth2 Client (
client_id=abcd); - The End-User (this is the subject set in the Login Flow);
- If a previous consent exists, the previous consent has
remember: true, and the scope granted by the user (did the user accept all ofemail,profile,offline_access).
There are three possible states:
- The user has never before authorized ("consent") the OAuth2 Client before.
- The user has authorized ("consent") the OAuth2 Client before and chose to remember the "consent".
- The user has authorized ("consent") the OAuth2 Client before, and chose to remember the "consent", but the OAuth2 Client now also wants additional permissions ("has changed the token scope" in /oauth2/auth?scope=...).
Regardless of which of these three states we're in, the End-User's browser is always redirected to the Consent Endpoint. What changes is the skip value, as explained a bit later.
In certain scenarios (for example a special OAuth2 Client), you might not want to show the consent screen at all. In those cases, you can choose to skip showing the UI and just accept the consent. Please keep in mind that OAuth2 is a delegation protocol and that it makes most sense for third-party access. Not showing the consent screen will break OpenID Connect Certification.
Consent endpoint code example
The Consent Endpoint uses the consent_challenge value in the URL to complete the consent using the Ory SDK:
import { Configuration, OAuth2Api } from "@ory/client"
import { Request, Response } from "express"

const ory = new OAuth2Api(
  new Configuration({
    basePath: `https://${process.env.ORY_PROJECT_SLUG}.projects.oryapis.com`,
    accessToken: process.env.ORY_API_KEY,
  }),
)

function authenticateUserCredentials(email: string, password: string): any {
  // Example method to authenticate users and fetch them from the DB.
}

// Please note that this is an example implementation.
// In a production app, please add proper error handling.
export async function handleLogin(request: Request, response: Response) {
  const challenge = request.query.login_challenge.toString()
  const { data: loginRequest } = await ory.getOAuth2LoginRequest({
    loginChallenge: challenge.toString(),
  })

  if (loginRequest.skip) {
    // User is already authenticated, don't show the login form and simply accept the login request.
    await ory
      .acceptOAuth2LoginRequest({
        loginChallenge: challenge,
        acceptOAuth2LoginRequest: {
          subject: loginRequest.subject,
        },
      })
      .then(({ data }) => response.redirect(data.redirect_to))
    return
  }

  // Show the login form if the form was not submitted.
  if (request.method === "GET") {
    response.render("login", {
      loginRequest,
    })
    return
  }

  // The user did not want to sign in with the given app.
  if (request.body.submit === "Deny access") {
    await ory
      .rejectOAuth2LoginRequest({
        loginChallenge: challenge,
        rejectOAuth2Request: {
          error: "access_denied",
          error_description: "The resource owner denied the request",
        },
      })
      .then(({ data }) => response.redirect(data.redirect_to))
  }

  const user = authenticateUserCredentials(
    request.body.email,
    request.body.password,
  )

  // Check login credentials (e.g. email + password) in your user database.
  if (user!) {
    response.render("login", { error: "invalid credentials", loginRequest })
    return
  }

  // User was authenticated successfully,
  return await ory
    .acceptOAuth2LoginRequest({
      loginChallenge: challenge,
      acceptOAuth2LoginRequest: {
        subject: user.id,
        remember: Boolean(request.body.remember),
        remember_for: 3600,
        context: {
          // You can add any context that you want to be available to the consent endpoint.
        },
      },
    })
    .then(({ data }) => response.redirect(data.redirect_to))
}
The response contains information about the consent request. The body contains a skip value. If the value is false, the user
interface must be shown. If skip is true, you shouldn't show the user interface but instead just accept or reject the consent
request!
Sequence diagram
Conclusion
In this document, we explained how to bring your own User Database, Login UI, Consent Logic, and Consent UI to Ory OAuth2 and OpenID Connect. We also provided a sequence diagram that describes the different API calls and HTTP Redirects when performing the OAuth2 flow. Additionally, we covered how to handle Login and Consent Flows using the SDK.
We hope that this documentation is helpful to you in customizing Ory OAuth2 and OpenID Connect to fit your needs. If you have any questions or issues, please don't hesitate to reach out to our support team.